-Maze-
|
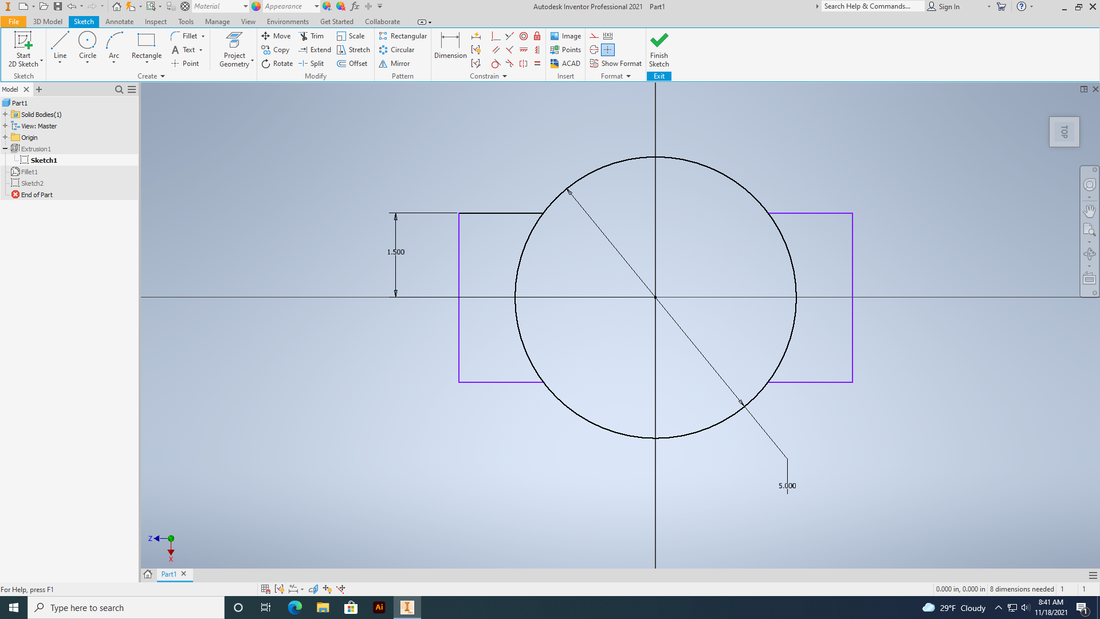
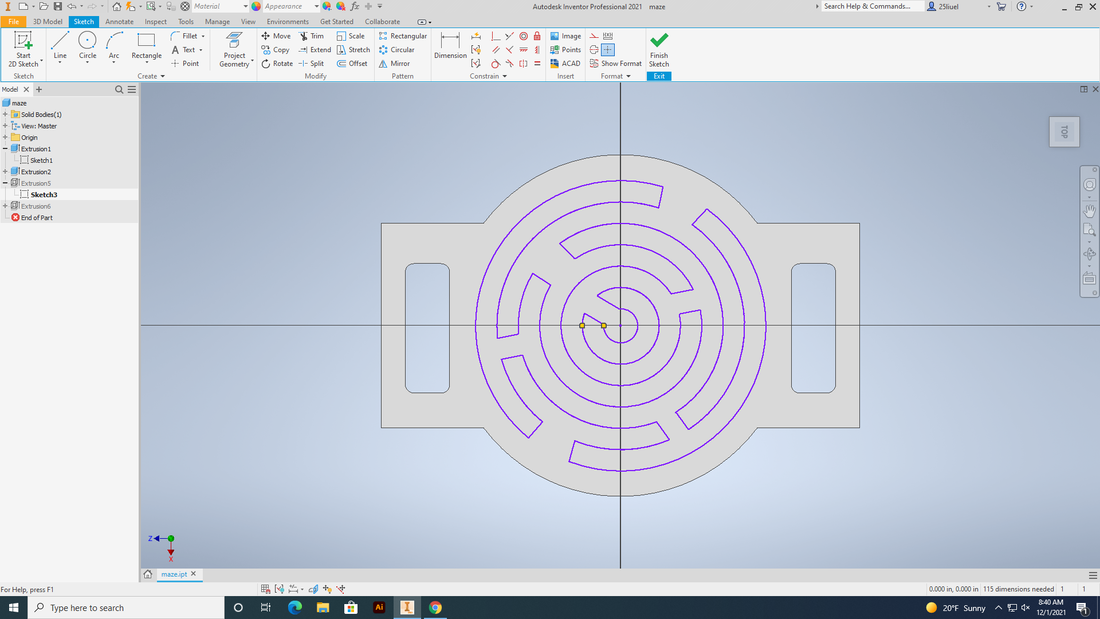
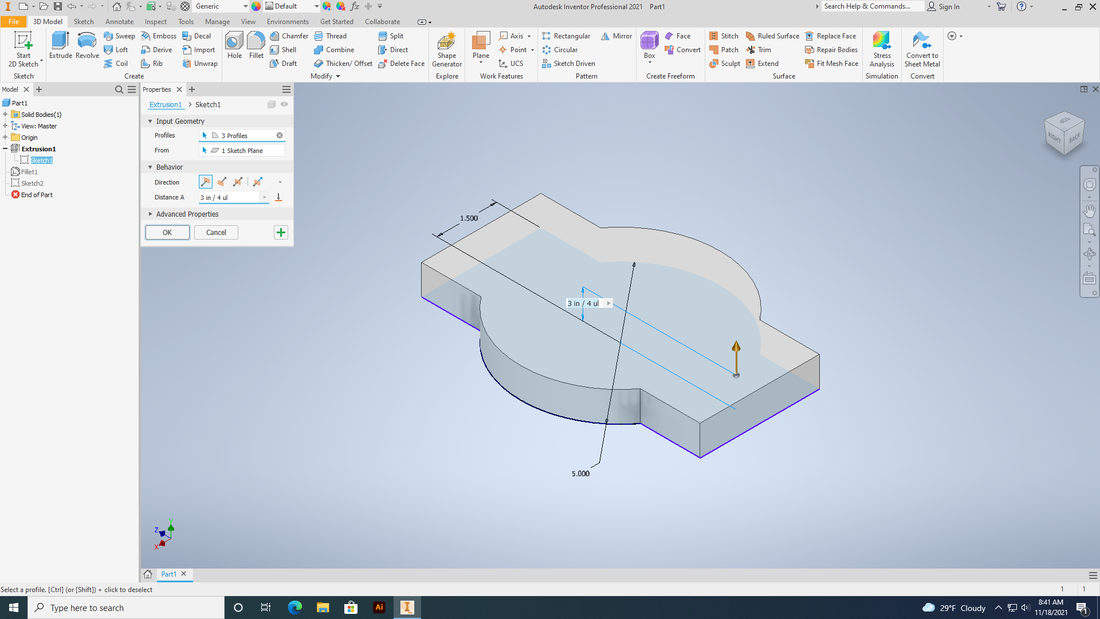
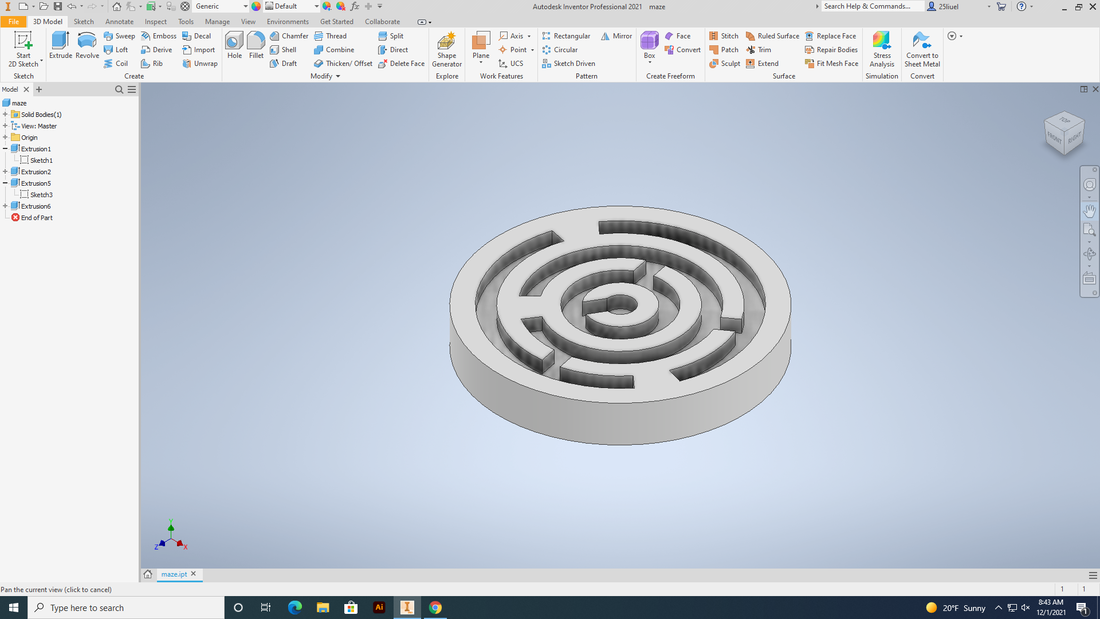
I used Inventor to create the rough outline for the maze, then I dimensioned it to how big I wanted it to be and rounded out the sharp corners. I extruded it 3/4", then I added the circles on the inside making sure they have a 5/16" width all around. Next I use the line tool to create paths to follow to create a maze, and used the trim tool to connect and cut out all the paths. Then I decided to remove the handles on the maze so I created a new sketch and outlined the handles and cut them out. Finally I extruded the channels 1/4" down.
|
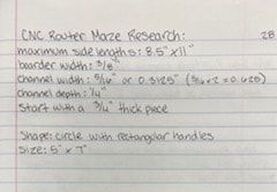
Dimensions for maze
|
|
|
-Fusion 360-
|
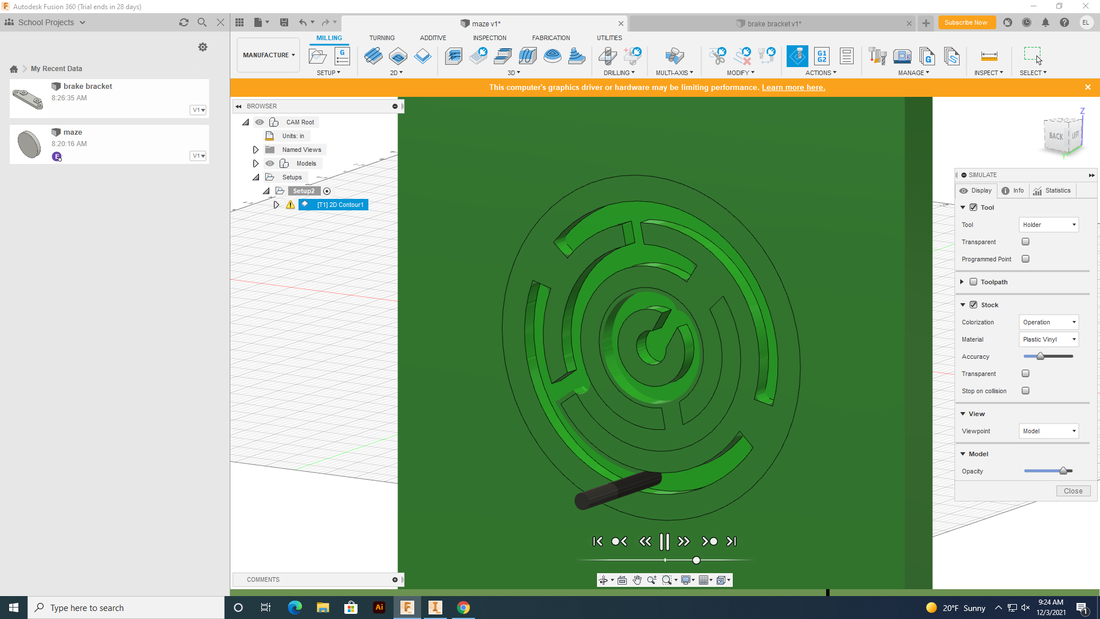
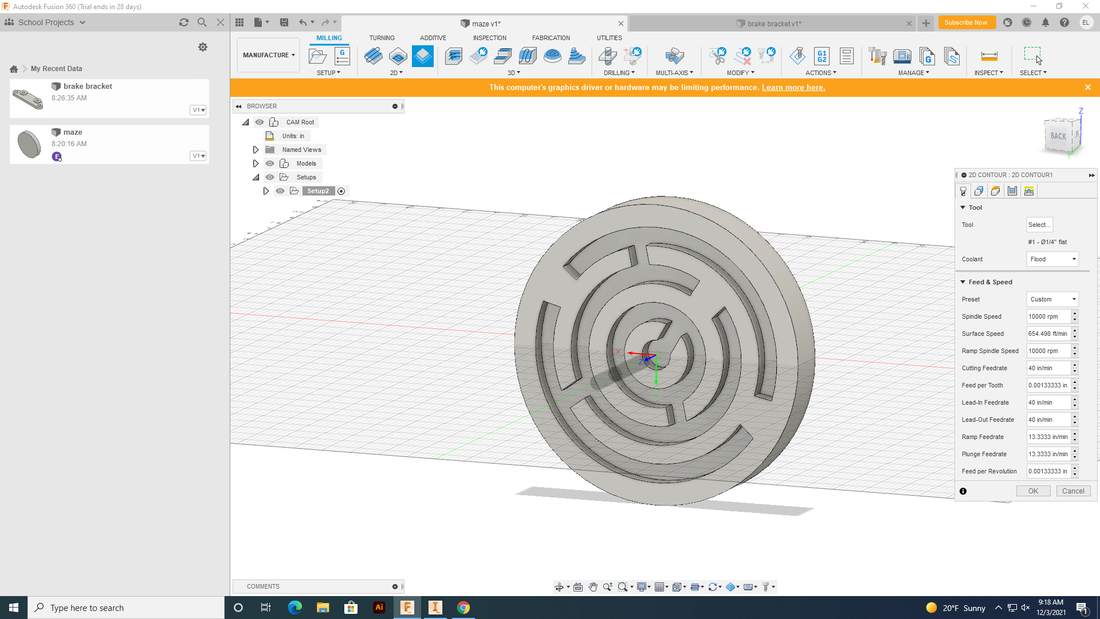
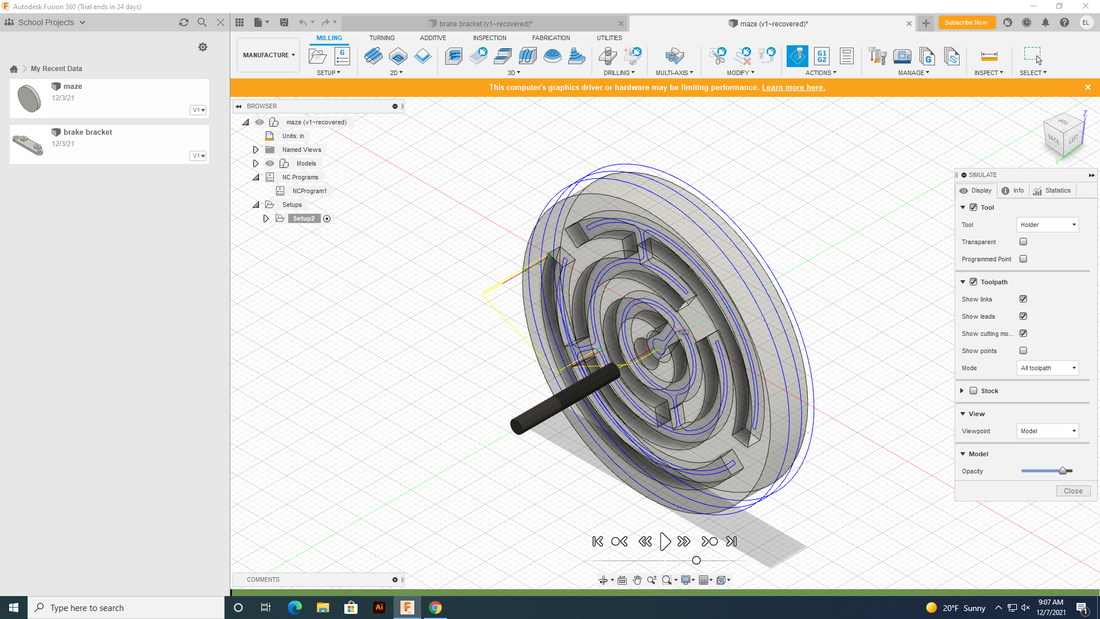
This is the maze in Fusion 360, the stock is 8" x 11" and with a height of 3/4". The last photo is the simulation showing the toolpaths the CNC router will take when carving out the maze. The maze uses a 2D contour to carve it out instead of a 3D adaptive clearing.
The photo with the green is showing the stock and that is the simulation showing how the machine will cut out the maze.
|
|
|
|
-Setting Up Router-
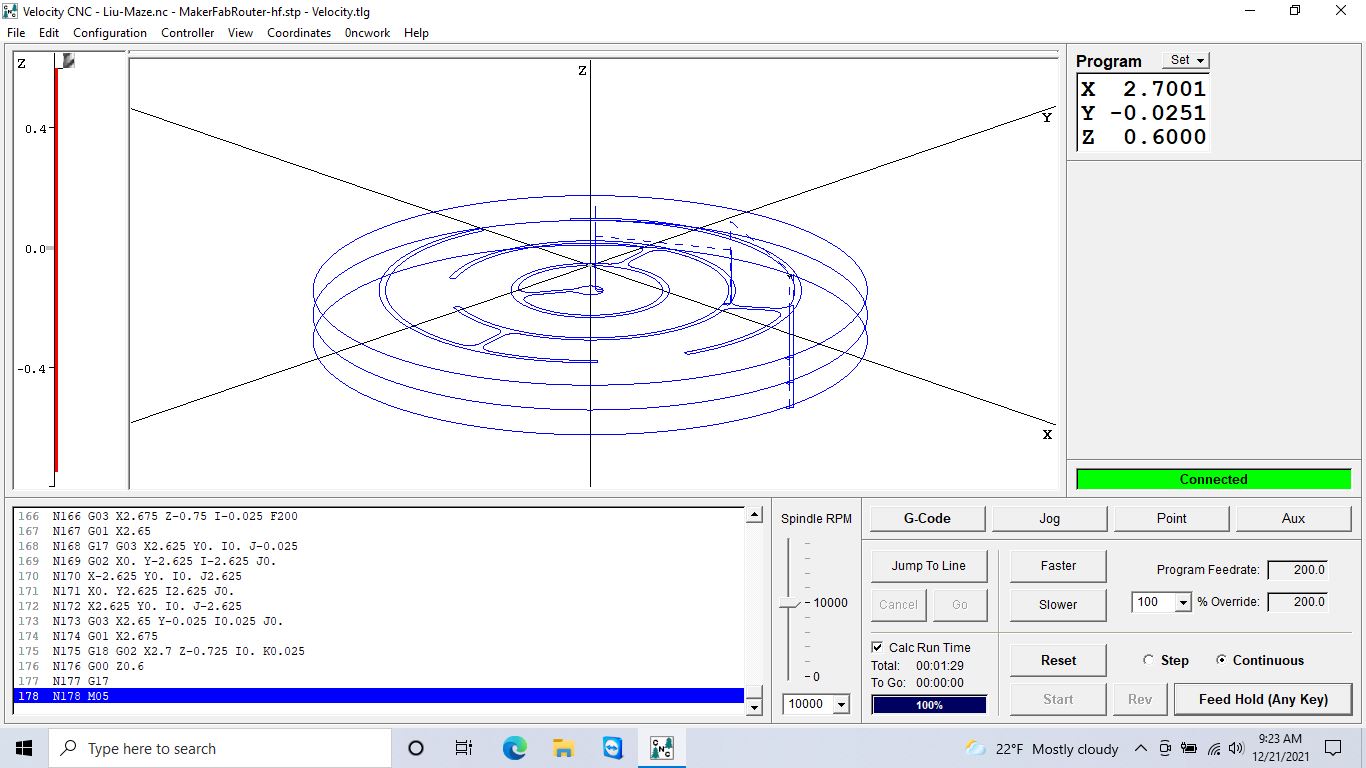
|
I plugged my flash drive into the computer and opened the G code file. Then I went to jog in the bottom right corner, I used the X, Y, and Z coordinates to move the drill bit to the center of my foam piece. Then I reset the X, Y, and Z values and hit start.
Before pressing start I also made sure to check how many times the bit went around the outer edge, so it wouldn't drill the wood underneath. |
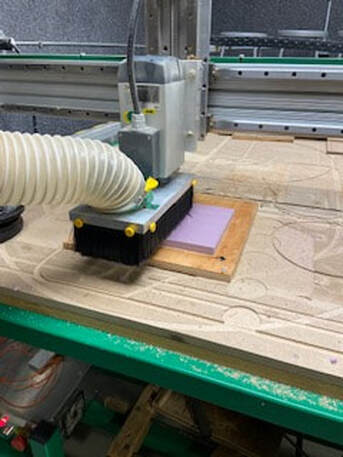
This is the router cutting out my maze
|
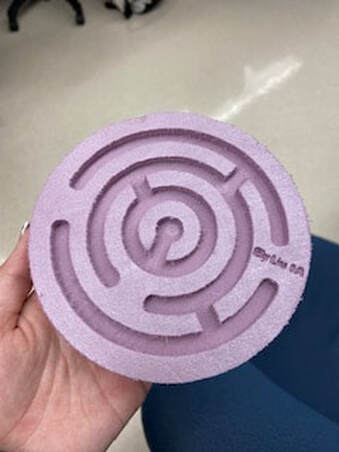
This is the final product
|
During this project I learned that you should always check your simulation before cutting or engraving, I had to make sure I didn't put the height of the material wrong or it would cut into the wood underneath the foam. If there were four passes going around the whole maze then it was wrong and would cut into the wood.
